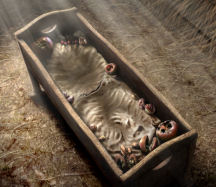
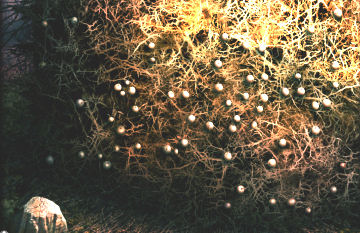
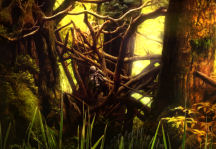
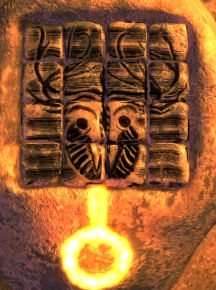
Nicolas Eymerich: The Inquisitor
By TiconBlu & Imagimotion
Walkthrough by MaGtRo
Gameplay: This is a third
person point and click game.
After opening the game, a configuration frame is
seen. Graphics: screen resolution, windowed and graphics quality selection
is seen. Input has keyboard input information and can be changed.
The main menu has play, continue, load, options
and exit selections. Book II has brotherhood added.
Options have language, enable dialogue text,
dubbing, Gfx mode, dialogue control panel, easy reader texts selection can
be done. Music and sound effects volume can be adjusted here. A tutorial
button is located at bottom center of page (Book II).
The game screen has menu icon (M), cross and book
at bottom of screen. Inventory can be see by using the pull down arrow at
top of screen or the use of the space bar.
The game menu can also be accessed by the ESC key.
It has main menu, save and resume.
The tab key will show active items one at a time
in the game screen or what to look for next.
The notebook at bottom right has objectives (lens) and
observation of the events (feather). The observation pages are read to you
when that page is clicked on. Click again to return to active game mode.
When an object or character is clicked on,
selection of action
icons is seen (look, talk or take).
Save slots (10 for book 1 and 20 for book 2) can be overwritten and label changed.
Click on the save bar at bottom to enter the save file.
Divine help - Cross: This functions as
the skip button or hint icon. It will skip puzzles or jump to the next
available action that will move the game forward. Using this lessens the
score.
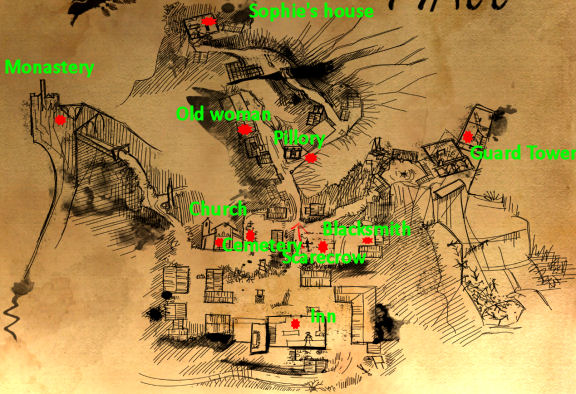
Map: A map can be obtained at
start of game. You can click on a location to jump there. It is seen as the
scroll at bottom right.
Easter Eggs (Book 1): During
gameplay, objects that should not be there can be seen. I did not find all
the Easter eggs.
Book 1:
The Plague
July 2013
1364: Nicolas Eymerich
arrives in Carcassone. He was called from Avignon by Father Vinet, head of
Holy Inquisition. The reason was not explained.
Carcassonne
Reason for summon:
Corridor: Look around.
Lion's head: Check the
lion's head left of the door. The lion's head have slots as big as stone.
Guard: Observe and then
talk to the mercenary guard wearing a pendant and has a strange symbol on his arm. Talk to the guard to gain entry to the study.
Enter the study.
Abbot Vinet: Observe and
talk to Father Vinet, the head of Inquisition. Pope Urban sent Eymerich's
work to the abbot. There are Cathari in Calcares.
Father Jacinto Corona was sent early September to
Calcares to investigate the disappearance of a Cistercian monk.
The abbot gets upset when Eymerich asks to be Head
Inquisitor. Learn that the guard by the door is the bastard son of the Count
of Toulouse.
Look around. Observe the crucifix, chest by
window, Virgin Mary statue, hourglass and Abbot desk. Exit the study.

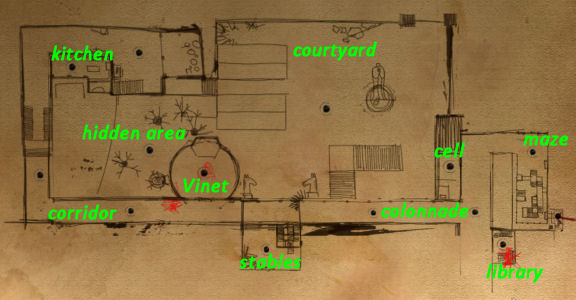
Get map:
Go left to the dark hallway.
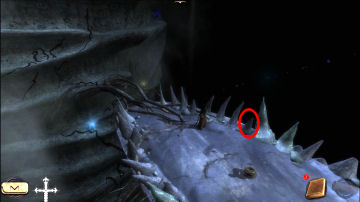
Easter Egg: Go down the
stairs and see a crack between the stones at right wall. See a lightning logo
of Imagimotion.
Map: Go forward to the
sign on the wall-bas relief on the right wall and Eymerich will copy the
map.
The map will now be seen at bottom right beside
the book. You can use it to jump from one place to the clicked on location.
Map locations will be added as they are seen in the game.
Go back to main corridor; then right to the
colonnade.
Find the stable and get horse to ride to Calcares:
There are several ways to get to the stables: use
the map; go back up and to the colonnade and then bottom right or go down to
the courtyard and go left to the stables from the courtyard.
Stable: Observe the
horse. Observe and take the saddle at left. The saddle has a broken
strap. Take the rope on the post at right.
Observe and talk to the stableman. Learn about
cursed Calcares. A female demon drawn by 4 beasts is seen by a returning
merchant. It takes at least 3 days to get to Calcares.
Easter egg: Take the rubber
chicken between the front legs of the horse.
Consult notes:
Colonnade: Go back to the
right and be at the colonnade.
Vision: Observe and talk to the shivering servant with
cap. He describes the vision of Diana seen in sky towards Calcares. The
woman has a quiver and a bow over her shoulder. There is a moon on her
forehead.
Observe and try to take the tapestry close to the
stable exit at right.
Eymerich's cell: Go down
the corridor and then enter the open doorway at top left.
Look around. Observe the window. It is like a
mirror.
Easter egg: Observe a
spider. If you have taken the wineskin from the kitchen already - use it
on the spider. Eymerich will make a comment about someone else dictating
his actions. (Thanks to Marjo of adventurespel.nl). Afterwards, trample the spider on the floor.
Click on
blue icon on the first step at left. It is the logo of TiconBlu.
Satanic apparition notes:
Go to and observe the bed. Observe and look closer at the
book-notes on the bed. Click on all the pictures in the book to get
descriptions.
Demeter: At the end
of the book after the glued pages, see the drawing of Demeter drawn
by 4 horses. Homer described the Infernal Charioteer in the
Eleusinian Mysteries.
Find the talisman notes:
Courtyard: Exit and go
down to the courtyard. Look around at the stick on ground, the headless
statue and other active place.
Monks: Talk to all the
monks and see what they have to say. One monk mentions a stink in the
corridors.
Tumbleweed: See a
tumbleweed on the ground between the statue and archway. Kick the tumbleweed
to have fun.
Vision: Click on
something in the sky above the collapsed wall at right. It is the way to
Calcares. This is where the servant saw the vision.
Notes: Check the
notes. Turn to the end of the book and see the list to make the burned at
stake brother's talisman. Huh!
The talisman is made up of natural elements of
particular shape: mushroom, flower, acorn, lichen and leaf of poisonous
herb.
Collect the talisman ingredients:
Mushroom and lichen: Go to the
alley between the boarded hut and the wall at right.
Take the peculiar mushroom from the ground
at left and the rare lichen on the beam or on the ground at wall of the building at
right.
Squirrel with strange acorn:
Go in between the two huts and see a squirrel running on the roof of left
hut. See that it is carrying a strange acorn. Eymerich says to trap the
squirrel.
Collect the stick on the ground between the
2 huts. Push the protruding beam under the roof of right hut.
Go left towards the stable and the rear. Observe
the collapsed staircase at right.
See that the squirrel goes behind the hut at left.
There is a wood gate blocking the way. Break the
gate and Eymerich kicks the fence down.
Click on hidden area-clearing between 2 trees and
Eymerich will say that it is the perfect spot to trap the squirrel.
Flower and Leaf: Go
farther to the bottom of screen. See and take a white horrendous flower.
See a trap door on the wall at left.
Exit and observe the strange plant left of the
entrance to the back of the hut or under the window of abbot's office. Take
the extravagantly shaped leaf.
Kitchen-larder: Go to the
kitchen-larder between the 2 huts. Enter the building, then right and
through kitchen-larder door at back right.
Go to far right screen and take big walnut
on the shelf left of the window. We will come back here later.
Exit kitchen and the building or jump to the
courtyard. Go to headless statue at center of courtyard.
Take the flat moving stone on the rim of
the headless statue's circular base.
Trap:
Go back to the back of the hut; where Eymerich says is a perfect spot for
trap.
In inventory combine the stick and the flat stone
to make a trap.
Use the trap on hidden area between the two trees.
Use the walnut with trap. It is ready. Now exit
the back of the gate area to not scare the squirrel.
Go back to the hidden area trap to get the
double acorn from the trap.
Get vision of Diana:
Catalyst-talisman: In
inventory click-hold-drop one of the catalyst items over another until they
combine to make the catalyst (acorn, mushroom, flower, leaf and lichen).
Go to the courtyard and see a faint vision of a
woman in the sky.
Use the catalyst on the woman in the sky over the
collapsed wall. The woman is the plague. There is a plague in Calcares.
Eymerich had the plague when he was young and now someone or something wants
him to see the plague in Calcares.

Go back to Abbot Vinet:
Study: Go back to the
abbot at his study. Talk to him about everything. Eymerich does not want to
leave until tomorrow. The abbot shrugs off the disappearance of the
Cistercian monk and state unsubstantiated political motives to what is
happening at Calcares. Ask about the merchant.
Find out what the Librarian is working on:
Library: Go to rooms at
end of colonnade. Enter the librarian's cell at bottom right.
Observe and talk to the stuttering librarian. The
librarian says that there are no copies of forbidden books like the Homeric
Hymns. The librarian does not want to help even though Eymerich gave his
credentials. Ask about the merchant.
Observe the locked chest at right.
Easter egg: Observe the
parchment right of the window (Don Zaucker).
Open the special book-dark book facing outward on
the bookcase (Father).
Observe the orbit of skull at bottom of bookcase
to hear spoken words.
Guard at Abbot's study:
Abbot's study is closed.
Talk to the guard. The abbot must not be disturbed
at present. Learn about another library but the guard wants a bribe to
continue talking. Ask about the merchant.
Librarian: Go back to the
librarian and inquire about the antiphonary that he is writing. He refuses
to let Eymerich to see what he is working on.
Antiphonary: Look around.
Observe the antiphonary that is being written and the copy of antiphonary
that the librarian is copying. There are strange codes at side of the
written antiphonary.
Look close at the antiphonary. Beside the
antiphonary is a sheet full of notes.
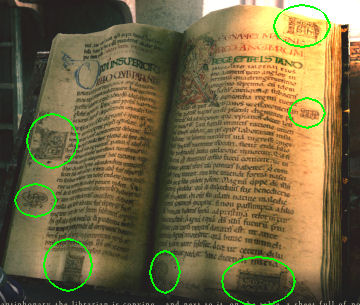
Click on the miniatures on the side of the written
text and the librarian notes at bottom right.
Click on the bottom right miniature and then the
librarian notes at bottom right to get a translation - Numen inest (There is
a spirit here).

Rags: Eymerich thinks
that the librarian is a secret Cathar. Talk to the Librarian again. Eymerich
offers to help clean the place.
Pick up 8 rags on the floor by the chair of
the librarian. 7 rags are easily seen. The 8th rag is as shown below.
Eymerich will say when all are collected.

Piece the rags together:
Go to Eymerich's cell. Look close at the
window.
Place one piece of the rag at a time and piece
the written words together. Click-hold-drop a rag beside another rag to
form words.
Be sure to drop the rag on the window
separately.
If correctly placed, the rag cannot be moved
anymore. Only 7 pieces will be pieced together. The rag with lines is
not used.
Consolamentum perfecti. The Cathars rules.

Confront the librarian:
Go back to the library and talk with the
librarian.
The librarian in fear of being staked reveals
where the secret library is located. The secret library is at end of middle
corridor beyond the staircase, hidden behind the altar of St. John with an
eagle at its feet.
The librarian tells the truth that he doesn't know
where the key to the secret library is hidden.
The librarian attacks Eymerich but was
overpowered.
Go to the colonnade and take a piece of the
tapestry hanging beside the entrance to the stables.
Go back to the unconscious librarian. Use the
rope-tapestry on the librarian.
Take the antiphonary and the copy of the
antiphonary.
Easter egg: (Thanks, Marjo of adventurespel.nl):
Keep
kicking the helpless librarian, until Eymerich says "I thought I heard his
ribs crack.
Check for items in corridor:
Guard: Observe the guard
outside the abbot's door.
Observe the medallion hanging on the guard's left
upper arm. It depicts Baphomet, the one
that is said to be worshiped by the
Knights Templar.
Eymerich thinks to get the guard drunk.
Dark corridor: Go left
from the guard. Go down the stairs and then left to the other dark corridor.
Gems: Pick up a ruby
gem-strange stone at right and the pulley beside it.
Pick up tiger's eye-another gem at left
hidden by a wooden panel on the floor.
Pick up a sapphire gem from the bottom log
left of the tiger's eye gem.
Go to the left and pick up the opal-gem
from the basin-bowl in front of the barrels.
Pick up another opal-gem and another
tiger's eye-gem by the potteries.
Easter egg: In inventory
combine the rubber chicken with the pulley. LOL.
Go to the dark corridor by the stairs at right. Go
to the alcove-hole on the wall.
Use the chicken with pulley on the hole on the
wall and enter a catacomb. Click on all the pictures to have fun. Check here
later
and more pictures will be added as you progress in the game.
Check for items in kitchen:
Enter the kitchen right of the potteries and exit. Look around.
Take the rag on top of the sink-well under
the window.
Take the metal object-handle from the
sideboard.
Counter: Click on the
green bottle with cork at bottom counter.
Take the clay colored bottle behind the green
bottle to get a wineskin filled with mediocre wine.
Observe and move the metal pitcher right of the
green bottle. Take the hexagonal piece of metal.
There is a closed hatch under this counter with
bottles and wine.
Observe the scale on the center table. Take the
pocket knife from the table.
Go right and move the pot-crockery at bottom
right. Take the triangular metal piece under the pot.
There is a closed hatch right of the window.
Get the guard drunk:
Guard: Go to the guard by
abbot's study.
Give the guard the wine taken from the kitchen.
Talk to him several times. No new information is gathered. He wants more
wine. He is getting warm.
Go back to the kitchen.
Look closer at the closed hatch under the
counter at bottom of screen. See a close up of a drawer with a keyhole.
Take 3 loose metal parts from the
edging of the counter above the drawer and 3 metal pieces on the
sides of the drawer.
Click on the drawer (not the lock) and select
these actions: hit, pull, push and move. Pull out of close up to reset.
Then take the fourth metal piece
(first-leftmost metal piece from the edging on top of the drawer) from
the top of the counter. Eymerich inserts the metal piece on the side of the drawer.
The drawer is opened.
Take the antidote and poison.

Get the key from guard:
Go back to the guard. See that he removed most of
his armor. Look close at the clothes piled beside the guard.
Use the poison on the Baphomet medallion.
Talk to the guard again. Eymerich tricks the guard
to kissing and then licking the medallion. The guard is now affected by the
poison.
Show the antidote to the guard. Eymerich does inquisitor justice. The
guard dies and Eymerich gets the secret library key.
Hide the body:
Jump to the kitchen. Look close at the closed hatch right
of the window at far right.
See a close-up of an lime encrusted panel under the
hatch.
Use the pocket knife from the table to remove the
crusts. Click-hold-scrape off the lime scales.
Use the 3 metal pieces taken from kitchen on the
shaped slots: hexagonal and triangular. Place the handle piece on the left
end of the bolt.
Click on the 3 pieces in the correct order:
handle, hexagonal and then the square bar at right
Go back to the study door and take the guard's
body. Eymerich drags it to the hatch and pushes him out.
Merchant information (optional):
Stable: Go left to the
stables. Talk to the stableman and learn that the merchant smells of the
plague. The merchant asked to stay the night at the abbey.
Merchant information: On the
hallway by the cell or library, see an insolent bald monk (or wait for one). Talk to the monk and learn that he
assigns the cells to visitor. Learn that Eymerich's cell is the cell that
the merchant slept in.
Easter Egg (Thanks to Marjo): When the bald monk
is near Eymerich, type DANCE MONK using your keyboard. The monk will dance.
(From
REDIIX: I found that using parser near bed (after talking with bald monk)
and writing "look under the pallet" (the phrase should autocomplete after
first/second word) enables you to finish the quest by looking under the bed
and finding a mandragore the unfortunate merchant tried to keep with himself
as means of protection. Thanks REDIIX!)
Remember also that one monk mentions a stink in
the corridor. Check the other 2 closed doors in this hallway.
Open the secret library door:

Maze: Go to the curtain
at end of the hallway beside Eymerich's cell. Enter and see a maze.
Take the lit candlestick on the left newel. Save
game here.
There are spike traps that prevents moving
forward.
Altar 1: Climb the stairs
to the right. Go down to bottom of screen. Go right down the steps to altar
1.
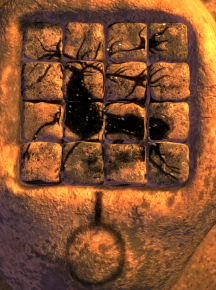
Look close at the mosaic background with a cross
at center.
To activate this altar; find 17 hidden buttons.
The mosaic dragon is a reset button.
The aim is to tilt the cross to the right until
Eymerich says all buttons are found.
Then click on the cross to put it back to center.
This removes the spiked trap on the stairs leading
to altar 2.

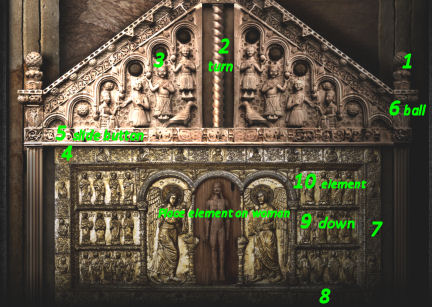
Altar 2: Go to center of
the maze or click on the altar at center of room. Completion of altar 1
removed the spiked trap on the stairs leading to altar 2; a travertine altar with bas relief.
Look close
and see an angel with no halo at center of angels, demons, saints and damned
souls.
To activate the altar, reliefs-hidden elements are
to be pressed in a specific order. Each correctly pressed hidden elements
opens the crack on the angel at center.
The crack opens to reveal that the angel is
really a demon.
This activates altar 3.

Emerald: Go down and take
the emerald-gem from the landing of the stairs.
Wall: At top of the
stairs, see a depiction of a lion's head on the wall. It looks like the one
by the abbot's door.
Altar 3: Click altar 3 to
go there.
Look close to
the now activated shrine-altar 3. It is made up of saints and angels with a
naked woman at center.
A decoration should be pressed to release another
decoration's active spot.
This removes the spiked trap on the way to altar
4.

Altar 4: Click on altar 4
to go there. Look close at altar 4.
Click buttons that are activated. The statue
rises.
Click on the lock and Eymerich will say he is missing something to
get to the secret room.

Lion's head: Go to the
lion's head left of the abbot's door.
Place the gems collected at dark corridor on the
slots of the lion's head. There should be 7 gems.
Place the opals on the ear slots and the tiger's
eye on the eye holes. Place the sapphire and ruby on the nostrils. Place the emerald on the mouth. Hear a sound.
Something has been released.

Secret library:
Go back behind the curtain. Get the candlestick
and go to Altar 4.
Enter the altar-shrine. See the forbidden books. We have to find Homer's
Eleusinian Mystery.
Place the antiphonary and the copy of the
antiphonary on the empty brazier. Eymerich burns the books to get light.
Easter Egg: Click on a
book that are in the pile under the stairway's arch at background to see a
yellow rose-Nomen.
Do the tab key and check the flames to get a new
frame in the catacomb.
Red ink: Go to bottom left of
the screen to see red ink.
Eymerich says that red ink is used by librarians
to mark forbidden books. Look for books with red ink on the spine. Pick
up red ink.
Homer's Eleusinian Mystery:
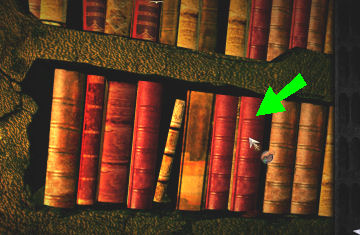
Go up the stairs at left to be on the landing.
Look at the top centre bookshelves. Pick the third
right of the small leaning book.
See the open book. Turn the pages
(click-hold-turn) until the worship of Demeter is seen.
Read a page and then see a drawing. Continue
reading the pages until all pages are read.

Confront Vinet and get power:
Go to the abbot's study. Talk to Abbot Vinet.
After the confrontation, Eymerich ends up being the Inquisitor General and
has the papal bull and ring to prove it.
Monk: Exit to the
corridor. Talk to the
insolent bald monk and see what Eymerich does to punish his insolence. The
monk is now assistant stable hand.
Leave Carcassonne: Go outside
to the courtyard. See the horse by the archway exit. Exit and travel to
Calcares.
The horse collapses and dies on the way. Eymerich
blesses the horse (but refuses to do so with the librarian, monk or
stable master).
Calcares
Outside town:
Look around. Observe the alley, puddle and cart.
Corpse: Observe the
corpse completely or else you will not be able to move forward in the game.
Front side: click on forehead-eyes,
mouth, chest. Click on pustules to turn to the side view of face.
Close up of face: click on temple, eyes,
mouth, pustules. Click on circular stone on ground left of the head and
chin. Eymerich makes comment about different kind of plague.
Click on circular stone again - it is an ear.
Automatically pull back from corpse.
Main Street:
If the corpse is completely examined, go to main
street.
Look around. Observe the carcass, column at right
and well. Check the Aurore inn and the door and landing next door.
Aurore Inn:
Innkeeper: Enter the inn.
Observe and talk to the innkeeper. She says it is safe here. She has
beverage of fruit from south.
Get the key of the room.
Take the torch right of the fireplace. Use
the torch with fireplace.
Landing: Go to bottom of
screen and climb the stairs to the landing. Eymerich places the torch on the
ring on the wall.
Observe the rag on the table, stick on the floor
and jars of wine-vinegar at end of hallway.
Room: Use the key on room
door. Look around and see cockroaches.
Observe and pull mattress. See a hole on the wall
where the cockroaches enter.
Hole in the wall: Exit
the room. Take the rag and stick. Combine the rag and stick. Use the
stick
with rag on the jar of vinegar.
Go back inside the room. Pull straw mattress again
to reveal the hole in the wall.
Use the stick with rag soaked in vinegar on the
hole in the wall.
Cockroaches: Click on a
cockroach and then stump on it. Do this until all cockroaches are gone.
Dream:
Go to sleep now. Eymerich dreams or has a
nightmare.
Fiery eyes: See eyes.
Walk left and then right. When you see eyes with fire; click to destroy it -
4 fiery eyes. When all are destroyed, see a flaming archway at right. Exit
through the fiery archway.
Greek letters: Walk on
hallway with Greek letters on wall. There are exits at each end of the
hallways.
Collect-click on all Greek letters from different
hallways - delta, eta, mu, eta with accent (?), tau, eta and rho.
Roman letters: Go through
the archway with white flame. Walk forward.
See Roman alphabet. Click-hold-drop the
corresponding Greek letter from inventory on that letter to take it.
DEMETER.
Book 2: The Village
January 2015
1364: In his dreams, Nicolas Eymerich
is visited by a devil woman. Eymerich wakes up in his room in the inn at
Calcares.
Part One: Aurore
Room:
Collect the pages of the diary:
Look at and pick up the notebook-diary
from the floor. Collect the 5 pages scattered on the floor.
Arrange the pages of the diary:
Open inventory at top of the screen. See the diary and the
collected 5 pages.
Click on a page or the diary to see the close
up of the 5 pages.
Arrange the pages according to sequence of
events of Book 1: The Plague; the events in Carcassonne.
Click-hold a page and then click it on another
page that you want to replace it with.
Use the amount of sand on the hourglass seen
at top left of page as clue. The reset arrow is at bottom right.
Arrange them from left to right.
- Eymerich arrives at Carcasonne.
- The vision of Diana in the sky.
- See Eymerich's book that contains his work
about the monsters and demons.
- Eymerich becomes the Inquisitor General and
receives the ring.
- See the Calcares village that has the
plague.

Notebook: Read the
notebook at bottom right. See the objective. The number by the notebook
denotes the amount of objectives to be done.
Read the back story-book 1 on the feather tab by
clicking on a page.
Search the room: Look
around. Examine the straw bed, urinal and window.
Pick up the spherical gem under the window.
A fragment of a strange jewel.
Examine and then pickup the knapsack left of
door. Get the papal ring, papal papers and inquisitor
patent. Examine the 3 items in inventory.
Exit the room.
Examine the landing:
Look around. Examine the barrels of stale wine at
back of room.
Window: Examine and then
look out the window. See the monastery's chimney with smoke from burning
plague victims.
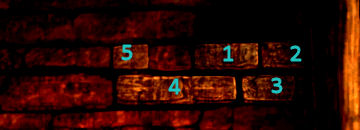
Bricks with names: See bricks
with names above the chest.
Chest: Examine the stinky
chest at foreground. It is locked and needs more than a key to open.
Movable bricks: Go to the
bricks on the wall by the stairs.
Take the
brick right of the darkest brick on the wall by the stairs. This makes
hole on the wall.
Move the bricks to open the place left of the
dark brick. Move-click the bricks clockwise until a hole shows a gem.
Take a piece of bronze from the hole on
the brick wall. A fragment of a strange jewel.

Inn:
Go down the stairs. Eymerich says he's hungry. See
a customer and a crying woman.
Order a
meal: Talk to the innkeeper and order food.
Customer: Examine the
customer at left table. Examine the bench the customer is sitting on.
Eymerich vetoed sitting on that bench.
Have the meal:
Examine the bench by the right table. Eymerich is served food.
Click on the plate to say grace-prayers.
On the background, click on the innkeeper when she talks to the
crying woman. They know each other.
Take the knife and cut the sausages (11
pieces) until the knife is automatically laid down.
Eat pieces of sausages and then drink wine
from the mug. Do this until all the sausages are eaten.
Break a piece of bread. Use the piece of bread
to soak up the gravy on the plate. Move the bread back and forth until
gravy is gone from the plate.
Crying woman: Look at and
try to talk to the crying woman.
Talk to the innkeeper about the woman. She says
that she doesn't know the crying woman.
Search the inn:
Look around. Examine the larder behind the
counter. Examine the candle and bowl. Examine the plate of food Eymerich
used.
Cloth: Examine the cloth
on the wall right of fireplace. Take the keys hidden behind the cloth.
Fireplace and ash:
Examine the fireplace. Take charcoal-ash heap on the floor in
front of fireplace.
Trophy: Examine the
animal skull on the wall right of the door.
Get gems: Close examine
the the skull shows it has engraving.
Use ash heap-charcoal on the animal skull.
Click on the pieces of the broken skull to get
gems: copper piece, piece of gold, piece of gold,
metal piece, metal piece, pyrite piece with skull shaped
decoration and copper piece. Automatically pull back when all are
collected.
Carpet: Pull back the
carpet on the floor beside the customer. See a girder-panel.
Move the girder-panel and take the ornament.
Understand the nature of the plague:
Go
upstairs to the rooms-landing by clicking on left side of the screen.
See the innkeeper sweeping the floor. Try to talk
to her.
Open the chest: Look close at chest. Eymerich says he has all the
keys to open this lock.
The keys taken from behind the cloth are seen
on the right side of the circular lock.
The keys are to be inserted in specific order to open
the lock. The puzzle is random.
The clue is to hover the
cursor over the locks. When you see a chest-open icon; select the
appropriate key shape to insert on that lock.
Insert all the keys (including the central
lock) to open the chest.
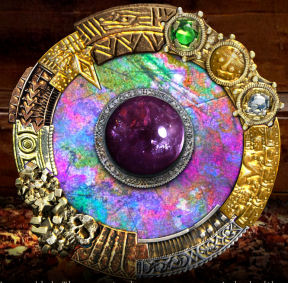
Stone with grooved borders:
See a colorful stone with an outer border.
Place the gems collected on the outer border.
Start with the piece of gold that has the point at
the bottom. Insert it on the pointed indentation at top left.
Using the notches or indents on the side of the
gems as clue, insert all the gems collected. A correct gem inserted can not
be moved anymore.
Place the spherical gem from Eymerich's room at
center of stone. It looks like a lens. Get an amulet.

Nature of the plague: Go to the
window to look out.
Use the amulet on the view. See the village, dead
hanging
people, abbey and the demon. Eymerich says there is evil in the Abbey. He
must find a woman.
Investigate:
Crying woman: Go
downstairs and talk to the crying woman. Her face changes to a skull. The woman runs away and leaves the
inn.
Customer: Hear the
customer say "Hounds of God" - a play on the word Dominican - Domini Canes.
Now you can talk to the smelly customer. The
customer wants proof that Eymerich is an inquisitor.
Take the papal ring from inventory and then strike
the customer.
Talk to the customer about the insult to the
Dominican order. Learn about the
other Dominican priest that has been drinking during his stay at the inn. That monk was here but left. The
monk keeps on saying - It's on me.
Learn that the customer is Roland Chevalier, the bailiff-tax
collector for Guillamune d'Armagnac.
Learn that the crying woman is the innkeeper's
sister.
Talk to the bailiff again about why he collects
taxes. A woman named Reinilde paid the taxes in this village.
Innkeeper: Go upstairs to
the landing
and talk to the innkeeper that denies her sister.
Strike the innkeeper. Sophie, her sister lost her
newborn child. Sophie lives near the spring.
Diary: Read the new page
about Demeter and 2-faced babies.
Missing Cistercian and Dominican priests:
Go downstairs and talk to the innkeeper again.
Learn that the missing village priest a Cistercian
monk locked himself in the church. The next day, the
church doors are barred.
The Dominican priest, Father Jacinto Corona
started by asking questions like Eymerich. Corona stayed at the
inn and just kept drinking wine.
You can now exit the inn through the door in front
of the customer.

Part Two: Plague Ridden Village
Diary:
Read the new pages in the diary (feather tab) in
the notebook. See the dreams of 2 faced babies and Demeter.
Read about Sophie who lost her newborn child. She
thinks it is the result of a ghost that impregnates women and deprives them
of their babies.
Sophie's home is near the spring in the village.
Read about the ghost that appeared summer solstice
when the plague and births of 2 faced babies started.
Read about Father Corona. The priest of Calcares
run away and barred the church after the followers of the new cult
desecrated it.
Village Square:
Look around. While walking around the village,
check the map every so often to see where you are in the map.
Examine the Aurore Inn door and windows. Examine
the locked door right of the inn and the landing windows above.
Examine and take the broken bucket by the
door. Examine
the human carcass on the ground.
Examine and try to push the column at center of
square.
Examine the well. Fumes are coming from the
bottom. Examine the bucket on the well. It was burned at the bottom. The
evaporated water must have been corrosive. Try to enter the well.
Church area, edge of village, monastery:
Continue to the area behind the well; between the
houses.
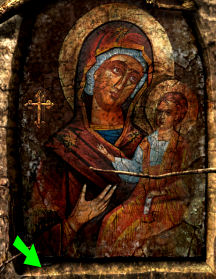
Votive icon: Look close
at the votive icon on the door of the house at right. See the exquisitely
made icon of the Virgin Mary.
See a cross left of the icon. It needs a thin and
resistant item to lever the cross out.
Church and bell tower: Examine
the church. It is barred. The bell tower looks like it was build before the
church.
See that there is a path left of the tower
that goes to the mountain and the monastery. Examine the smoke of the monastery.
Rock: Follow the path
left of the church.
Examine the rock that block the way to the woods
and has lava flowing from it.
Monastery: Continue up the
mountain.
Examine the door of the Cistercian Monastery. It
is closed from inside. Eymerich says to find another way.
Examine the hills holding the monastery. It is
seeping magma.
Village:
Go back down to the church. Go right of the screen between the church and the
house with the icon to go to the residential neighborhood.
Examine the thorny shrub at foreground. Examine
and look close at the trunk of the tree right of road.
Examine the smoke coming out of the monastery.
Calcares cemetery:
Examine the cemetery right of the church wall. Absolve the cemetery.
Look close at cemetery twice. See smoke coming out
of the earth.
Crossroad: Go right
between the houses. See a hut with a torch on the wall.
Go down and see the crossroad. To the left is the
scarecrow; bottom right goes to the guard tower, right goes to
village proper and top goes back to the church-cemetery area.
Scarecrow: Go left and
see a big torch behind the scarecrow.
Examine and look close at the scarecrow guarding
the field. Go to and examine the field.
Blacksmith shop: Go right
and see a hut. Examine and look close at the blacksmith shop.
Go back to the path left of the scarecrow.
Village proper: Take the path
going top right to the village. Try to talk to people. They are scared.
Walk to the right. Hear a voice calling out.
Old woman: Continue to the
right and be close to a house with a chimney on the left. The window is
latticed.
Listen to the screaming. Eymerich says there must
be someone in the window.
Look close at the window. See hands with long
nails and wearing rings and bracelets. Talk to the old woman. Refuse confession.
Town Hall: Continue to
the right and examine the town hall.
Barrel: Go down the stairs of
the town hall and examine the barrels left of the platform.
Look close at
barrels and see that it is sealed with wax. Eymerich says he needs a scalpel
or something similar.
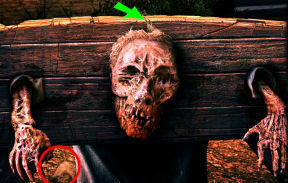
Pillory: Go back to the
old woman's house. Exit to the path across (bottom of screen) from her
house.
See the pillory at the corner. Examine and look
close at pillory. See a rotting body. Eymerich says the wretch might
be useful in some way.
Building: Continue down. Look
close at small building beside large house. It has straw inside.
Continue on the road behind the small building
pass the building with long stairs on the left.
Incomplete house: Examine the
house that is never finished. Look close and see that it has no roof.
Find Sophie's house:
Continue on and cross the bridge to the houses
behind the spring-waterfall.
Spring: Examine the
spring-waterfall. It is the source of evil. It releases lava and sulphurous
vapours.
See 3 houses behind the spring. Examine and look
close at all 3 houses. One of the houses is Sophie's. The innkeeper said
that she lives by the spring.
Look close and knock on all 3 houses. They all seem
abandoned.
House 2 (middle): Examine
the smoke coming out of the chimney.
Look close and knock on the door 4 times. Eymerich
says to find a more persuasive solution.
Guard Tower:
Use the map to jump to the crossroad close to the
scarecrow. Take the road going downhill at right.
See a bloody trail going up to the tower.
Gear: Eymerich stops at
the landing of the stairs.
Pick up the wooden gear at the corner close
to the next set of stairs.
Climb up and examine the courtyard.
Catapult: Climb the first
ladder of the catapult.
Pick up the wooden gear under the top
platform.
Climb up to the platform. Examine the stones used
as ammunition of the catapult. Try to pick up the stones.
Pick up the wooden gear left of the
catapult.
Examine the catapult and see that the ropes are
broken and need to be replaced with elastic rope.
Look close at the open gear box at the base of the
catapult. We need more gears.
Bloody trail:
Go down to the courtyard. Face the boulders with
blood trail right of the steps to the tower.
Examine the blood trail and Eymerich says it goes
to the back of the tower.
Climb the boulder using the small boulders below as
stepping stones to get to the top.
Go to the back by following the bloody trail.
Mass grave: Examine the bodies
in the ditch twice. The bodies are only male - no women.
Guard Tower:
Go back to the stairs going up the tower.
Armoury: Enter the lower
entrance. Look around.
Examine the weapons that are around and the manhole on
the floor.
Guard bunk: Enter to the
left and be at the bunkroom of the guards. See 3 corpses.
Examine the corpse at the corner. They committed
suicide. They do not show signs of disease.
Take the wooden gear from the foot of the
corpse at bottom straw bed.
Watch room: Climb the stairs
(marked below).
Look at the blood at left corner. Blood is
dripping from the ceiling.
Move to center of room and examine the ceiling.
Eymerich says a corpse of a watchman hangs from the ceiling.
Chief guard: Examine and
talk to the infected guard sleeping by the window. He is still doing his
duty of keeping
watch.
He is Vincent Dupont, Captain of the men serving
here. He doesn't like the Anglo-Saxons. The mercenaries escaped from the
evil. They were hired by Roland Chevalier the bailiff to isolate the
village. The appointment came from the monastery.
The plague corpses are only men; the women
are immune. Dupont thinks he knows why.
Talk about the catapult. He is the commander of
the ballista section. He can show how good he is on the ballista especially
with an English target but the catapult is broken.
Steps: Climb the steps at
right. Pick up the wooden gear on the ledge. 5
wooden gears should be collected by now.
Get items to fix the catapult:
Scarecrow: Use the map
and jump to the scarecrow area.
Examine and then look close at the scarecrow.
When all 5 gears are collected and the chief
guard wants to show how good he is on the ballista; the scarecrow will be
active.
- Remove the shirt of the scarecrow.
- Remove the ropes on both arms.
- Remove the 2 branches serving as the arms.
- Click-hold-sweep the straw used as stuffing off
the body.
- Take the cloth from the head.
- Remove the bundled straw used as body.
- Remove the plank holding the arms.
- Remove the straw stuffing of the arms.
- Take the left nail.
- Remove the right bent nail.
- Remove the face.
- Take the horse hair.
Examine the cloth in inventory. Eymerich says it
is a red and blue checkered cloth that reminds him of the English Royal Army
standard.
Fix the catapult:
Jump to the catapult at the Watch Tower. Look
close at the catapult.
Rope: Pull the horse hair
in inventory and then use the horse hair on the broken rope.
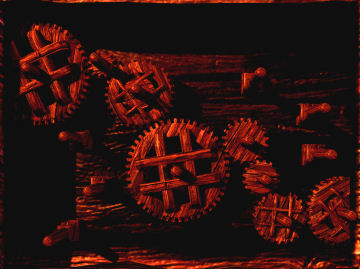
Install the gears: Look
close at the open gear box at base of the catapult.
Place the 5 gears so that the left moving gear
connects and turns the right gear.

Chief guard: Talk to the
guard at the tower. Tell him that there are English troops around. The guard is happy. He wants to hit them with the
catapult.
Talk to him again to tell him the catapult is
fixed. The guard goes to the catapult.
Mark Sophie's house:
Jump to the spring. Look close at Sophie's house
door.
Use the blue and red checkered cloth (like English
Royal Army standard) on the door.
It is automatically nailed on the door. Eymerich moves out of the way.
Guard: See Dupont load
the stone on the catapult. Dupont dies just before the stone is released.
The stone destroys the door.
Diary:
Check the new pages in the diary (feather tab) in
the notebook.
Read about rich houses in Calcares before the
plague.
Learn how the Cistercian managed the
village. They gave the money to pay the taxes to Chevalier the bailiff for
Lord d'Armagnac. Reinilde a gentlewoman served as intermediary between the
monks and the bailiff.
Review about Dupont the chief guard.
Eymerich questions the how and why the Cistercians
paid for a band of mercenaries.
The plague affects the men and spares the
women.
See the mass grave made by Dupont to try to limit
the disease.
The smoke from burning the plague victims at the
monastery is depicted.
Part Three: The Rosary of Death
Sophie's house:
Enter the house.
Talk to the husband of Sophie.
Examine and talk to Sophie. She wants Eymerich to
go away.
Look around. Examine the bed, soot covered window
and brazier.
Go left and examine the clothes chest and the
knife. Examine the basket of fresh apples and sack.
Missing crucifix:
Examine the sign of a crucifix on wall right of the window covered with
rags.
Sophie's baby:
Crib: Examine the
crib beside the bed. Pull the crib to see that it is empty.
Look close at the crib.
- Examine the berries: berries, blackberries and
blueberries.
- Examine the tear on the bedding - looks like the
throat was cut.
- Examine the indentation of the head. The head
was abnormal.
Sophie blames the Christians for the plague by
sowing death where there was life. Look at Sophie again.

Husband: Talk to the
husband. Learn that the baby's skin and body dissolved to pale mush and
evaporated. Blood dissolved completely.
Learn that the baby had 2 faces; one on front and
one on the back. The husband heard Sophie and when he came in saw the knife
and blood everywhere. The berries in the crib was placed by his wife.
Get materials for the rosary:
Exit the house. Eymerich wants Sophie to talk. He
wants to make a rosary.
The diary notes has the procedure. Read the very
last page of Eymerich's notes ( 2 books tab). Get rosary note in
inventory.
Teeth: Jump to the
pillory. Look close at the dead man on the pillory.
Click on hair to raise head and pull hair. While
click-hold the hair, click it on the crack just above it - this holds the
head up.
Pick up the rock seen at bottom left. Use the rock
on the face; then get teeth. Do this ~ 5 times. See 6 teeth collected
at top of the pillory.
Take a finger from the hand at right.
Automatically pull back when done. Eymerich prays over the dead that he
abused.

Berries: Jump to the
cemetery area and brambles.
Look close at brambles at foreground. Collect all
the berries. There are several at the dark left side of the screen. Automatically pull back when all are collected.

Crucifix: Jump to the
area by the church and votive icon.
Look close at the votive icon. Click at base of
the icon to pull out a hidden iron coin.
Use the coin on the crucifix. Get the crucifix.
Make the rosary:
Jump to the intersection with the pillory.
Old woman: Talk to the woman
in the window. If you haven't yet, examine her hands with rings and
bracelet.
Hear her confession. Learn about the new cult.
Every Saturday night, the young women fly in the sky, riding strange beasts
and
steal children. They meet in the woods, dance naked and then eat the stolen
children.
Her penance is to make the rosary. Eymerich notes
her bracelets.
Talk to her again. Give her the berries (click on her
hand) and all items are automatically given to her.
Get rosary: Leave the
close up; move to the road and then go back to the window.
Talk to the woman again. She is dying. Eymerich
absolves her. She dies.
Look at the rosary in inventory.
Get Sophie to talk:
Jump to Sophie's house.
Talk to the husband standing outside the house.
Apologize to the husband.
Enter the house. Talk to Sophie.
Eymerich brings a gift. See the empty crib. Place
the rosary on the crib.
Sophie gets enraged on the insult given to the sacred bride.
Sophie attacks Eymerich.
Sophie admits to killing her own child. Her husband
stabs Sophie and kills himself.
Diary:
Check the new pages in the diary (feather tab) in
the notebook.
Review the findings about Sophie's baby.
Review the new cult of the women and Sophie's admission about
her newborn son.
Part Four: Corona
Look for Father Jacinto Corona:
Eymerich wants to find Father Corona, the other
Dominican priest sent here ahead of him.
Entrance to the village:
Jump to the front of the inn.
If you haven't yet, take the broken bucket right
of the entrance of the Aurore Inn.
Go left from the Inn and be at the entrance to the
village.
Look around and see a puddle and the alley.
Examine and try to take the corpse at right.
Alley: Examine the alley
behind the dump.
Listen to the alley and hear a grunting of a pig.
Enter the alley. Look around. Examine the broken
wheel, foul smelling planks, barrel and the stuck bar at end of alley.
Refuse: Examine the refuse at
left. Listen to the refuse to hear the grunting of the pig.
Look close at refuse. See straw, wood and rats.
Eymerich doesn't want to clear the refuse unless the rats are gone.
Remove rats from refuse: Pull
off the foul smelling planks to expose a rotting goat. The rats feast on the
carcass.
Clear the refuse: Look close
at the refuse. Remove the wood and straw by clicking on them. There he is -
Father Corona.
Wake up Corona: Examine Father
Jacinto Corona
of Valladolid. Strike and kick Corona several times. He's too drunk.
Go back out of alley. Use the broken bucket with
the puddle.
Go back to Corona in the alley. Look close. Use
the bucket with water on Corona. He's awake.
Corona: Talk to Corona.
The 2 priest updated each other.
Corona thinks the monastery is hiding something
diabolical like flames of hell.
Burn the village:
New mission: Read the new
objective in the book - Turn the village into burned land.
Character changes: Click
on character icon at bottom right to change characters. The active character
is seen.
Click the character icon to be Corona.
As Corona:
Alley: As Corona, examine
and then enter the alley.
Examine the goat and then the barrel. Ah, Corona
did that stink.
Pull the stuck bar close to the barrel at
end of alley.
Exit the alley. Examine the puddle and corpse.
As Eymerich:
Blacksmith shop: Change to
Eymerich. Walk or jump to the scarecrow area.
Cross the field across the scarecrow, pass the
gulley and be at a hut.
Examine the hut. Look close at the blacksmith
workshop.
Examine the hammer. Take the chisel from
the bucket.
Exit the shop.
Barrel: Jump to the
barrels beside the town hall.
See and look close at the barrel left of the town
hall platform and close to the old woman's house.
Eymerich talks to Corona (can be before). He wants Corona to
repent. He absolves Corona.
Look close at barrel again.
Pour the tar: Use the chisel
to remove the wax. The chisel becomes the cursor. Click-hold and scrape the
wax around the edge of the lid.
See that the barrel is full of tar. Push the tar.
Eymerich calls Corona. Kick the tar.
See the 2 priests at edge of village by the
scarecrow. The tar has been poured.
Light the tar: Go left to the
torch on the hut. Take the lit torch.
Use the torch on the tar. Watch as the village
burns.
Corona questions about the innocents. The priests
watch the village burn.
Part Five: Sisters in the Dream
Village:
Smell the blaze. Eymerich gets high on the smell
of napalm. Examine the village.
If you want: you can visit the catapult and check
on the chief guard and the catapult.
Monastery:
Jump to the church area. Take the path left of the
bell tower.
If you haven't yet, check the rock blocking the
way to the woods.
Gate: Climb to the
monastery gate. Look around.
Try to open the gate. Jacinto tries to open the
gate. It is blocked from the inside.
Proposal:
3 Women: 3 women appear:
Medusa, Demeter and Diana "twins". Demeter says they can help.
Examine Medusa, Demeter and Diana who looks like
16 years old. Talk to any of the women.
Demeter is the mother; Medusa and Diana are her
daughters.
To help them get in the monastery, the 2 priests
must enter into carnal wedlock with Medusa and Diana.
Decision: Refuse the
proposal.
Talk to Corona. Corona advises that they accept to
learn more about their intentions, possible way to the woods or enter the
monastery.
Talk to Demeter and accept the proposal.
Diana is Eymerich's bride while Medusa is Corona's
bride.
Bride Gifts:
As Eymerich:
Eymerich needs a bride gift for Diana (objective). Remember that Diana is the goddess of the hunt.
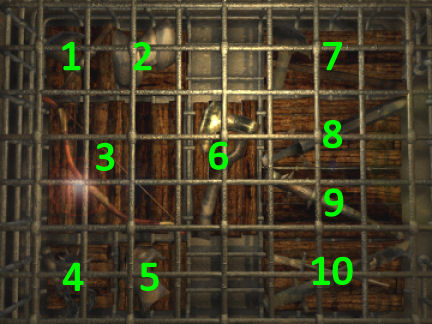
Armoury: Jump to the
armoury at the guards' tower. Look close at the weapons.
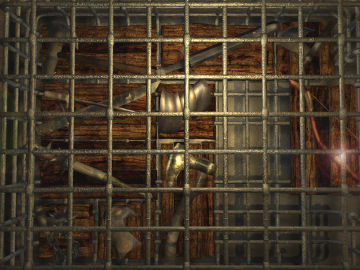
Bow slider: The aim
is to take the bow from far left of the cage by sliding it out to the
exit at right.
Slide the weapons out of the way.
The numbers shown on the picture below is for that
particular weapon.
Take the bow.
|
6 (axe) down.
small 2 & 1 right & down above 6.
3 (bow) up.
small 5 up & left above 4.
6 left.
small 1 & 2 down.
3 right.
5 & 4 up.
6 left
1 left & down beside 2.
3 down.
7 left.
8, 9, 10 up.
1 & 2 right.
3 down.
9 left.
10 up.
|
1 over 2 at right.
3 right
6 right.
4 & 5 down.
7 & 9 left.
8 & 10 left.
1 & 2 up.
3 right.
6 right.
5 right & down.
9 down
10 left
2 left.
3 up & out. |
 |
 |
As Corona: Change to Corona.
Jump to monastery gate. Look at and try to talk to
Medusa. Corona needs a jewel in a form of a snake.
Jump to scarecrow area. Be sure that you got the
iron rod from the alley already.
Look at and take the big torch behind the
scarecrow.
In inventory take the big torch and combine it
with the bar from the alley.
Use the combined torch and rod on the blaze
of the burning village at end of the path.
Blacksmith shop: Go to
the blacksmith shop across the field from the scarecrow.
Look close on the top part of hut to be in the shop. Take the hammer
propped on the furnace.
Make a spiral bracelet.
See the arrows that moves the heated bar on
the anvil.
The left arrow moves the bar forward, the right arrow
moves it back. The up and down arrows flip the bar. Good luck.
When the bar is now spiral and is shaped, Corona will say
so.
Eymerich asks about the head. Hit the spiral
again and a head is made.
Give the gifts:
Go back to the monastery gate.
As Corona: Give the snake ornament to Medusa.
As Eymerich:
Use bow with Diana.
Talk to Demeter. Demeter officiates the wedding of the 2 couples.
Part Six: Beyond the Shadows
As Corona.
Corona finds himself and Medusa in a cave-ravine
behind a waterfall. Map access is gone.
Cave: Look around.
Examine the waterfall. Corona can see the guard's
tower in the distance. Try to get water and see that it is freezing.
Examine the liana hanging left of the waterfall.
Examine the pebbles on the rock facing the
waterfall.
See snakes on the wall behind Medusa.
Examine the seat Medusa
is sitting on.
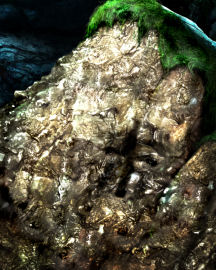
Examine the damp rock covered with moss and mud at
the foreground.
Resist temptation:
Examine the right stalactite that drips water.
Medusa: Look at and
then talk to Medusa.
The hidden snakes come out above Medusa. Look at
the snakes again.
Lips: Look at Medusa.
Look close and then click on her lips. Corona is tempted and quotes Song of
Song 4.
Resist: Take the liana
hanging left of the waterfall.
Use the liana on Corona. Flagellate Corona 5 times
until he says he feels better now. Note that the snakes' head are now
turning red.
Chest: Look close at
Medusa. Click on her chest. Corona quotes Song of Song 4.
Resist: Pray on the pebbles on
the stone facing the waterfall. Corona kneels on the pebbles. The snakes'
head are getting brighter.
Stomach: Look close at
Medusa. Click on a drop flowing down her stomach.
Resist: Take water from
the waterfall. Corona holds the water in his hands.
Take the water from inventory and use it to
cool Corona.
The snakes are all bright now and have converged.
Look at the snakes and they look hostile and will attack Medusa.
Legs: Look close at
Medusa. Click on her leg.
Resist: Look close at the
moss-soil covered boulder in the foreground.
Click-hold and form a cross on the surface of the
boulder.

After Medusa's
failure to entice Corona, she is bitten by her snakes. Medusa admits that she is not Medusa; she
dies.
Find the right exit:
Leave the cave by going left. See 3 exits.
Examine the ceiling and see light.
Examine the exit on the left surrounded by snake
carvings. Try to exit. It's too narrow.
Examine the middle dark passage. Get
detritus-pebbles from center of the floor. Use the pebbles on middle passage.
Corona hears nothing.
Use pebbles on right dark passage. Hear the pebble
drop on the ground. Enter the right dark passage.
Medusa's ghost, guilt and element puzzles:
Stalagmite cave: See
stalagmites all around the cave.
Look at Medusa's ghost at right. She disappears
and a ring puzzle is seen.
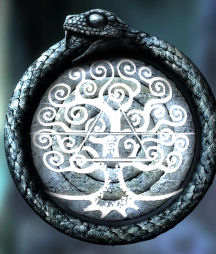
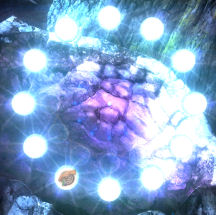
Tree ring puzzle: Look close at
puzzle. Form the tree of life by turning the rings.

The solved puzzle forms a ring staircase. Walk the
cliff path at top left by clicking on the path.
Cliff path: Go
forward until the next Medusa ghost. Click on ghost to see the next
puzzle.
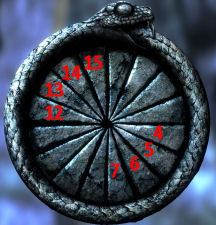
Wedge puzzle: See a
circle divided into 16 wedges.
The aim of the puzzle is to open all wedges to
form a picture.
Each wedge when clicked on opens the 6th wedge
on left side and on right side.
Numbering the wedges 1-16 starting at top
right; click in this sequence: 5, 6, 7, 4, 13, 12, 15 and 14.


Lava river:
Go forward and down the boulders on the cliffside until the next Medusa
ghost. Click on ghost to see the next puzzle.
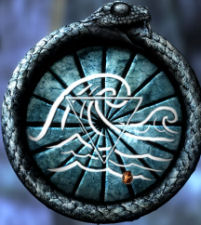
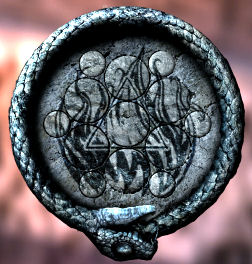
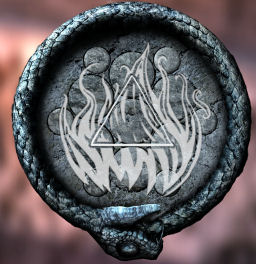
Flames puzzle: See
circles within the circle.
The aim of the puzzle is to turn the small
circles to form an image of flames.


Tower:
Cross the lava river and see a tower with spiral
paths.
Collect stones: The aim here is to collect 15
inscribed stones. The stones are strewn all over the spiral path up to the top of
the tower.
Colored crystals mark the change in levels of the
path.
Clicking a foot cursor or take cursor on a place
or item will get Corona to automatically go there even if it is n
another level.
If he gets stuck, click the foot cursor left
or right and he will move.
Go up the tower:
- After crossing the lava river, go left pass
the green crystal. Collect 3 stones pass the waterfall.
- Return to the green crystal at right. Go
right and up at green crystal.
- Go pass red crystal and continue right.
- Continue to down path; pass the yellow crystal at
the split. Take 3 stones pass the waterfall.
- Continue; go up and right of the purple
crystal. Take 1 stone.
- Continue and take 3 stones. (See the
ghost below).
- Continue until split in path - take a sharp
left. (See 3 stones below, we will get it during the return.)
- Continue until light blue crystal. Take the
up right path.
- Continue to orange crystal. Take the bottom
right path.
- Continue to split in path. Go up right path.
- Continue to split. Take up left path. Take
1 stone (this is the topmost stone).
Return-go down the tower:
- Turn back to the right and continue to the
split. Go down and left.
- Continue left to the split in path.
- Go pass orange crystal, continue to the
left.
- Continue pass the light blue crystal to go
left. Take the 1 stone and then 3 stones.
- Continue to the left and then down to the
ghost.
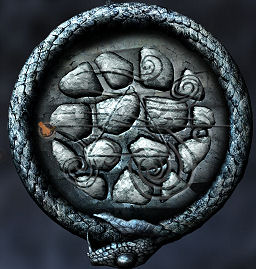
Stone puzzle: Click
on ghost to see the next puzzle.
Place the stones collected on the correct
place.
Corona justifies what he has done to
Medusa - he resisted.

Snake and stalagmites:
- Go to top left path from puzzle. Continue to
the right.
- Continue pass the stone snake on the path
until the turquoise crystal. Take top path.
- Take the top path pass the yellow crystal.
- Go left from the dark blue crystal.
- Take the down path on the split.
- Take the down path on the split again.
- Continue until the bridge made of branches.
Click on ghost and see a snake on the floor.
Snake: Examine the
snake. The snake will bite if you try to pass by it (you will start
over).
Take the stalagmite with a bent tip
left of the large crystalline stalagmite on the right edge of the
platform.
Use the stalagmite on the snake. Examine and
take the snake carcass.
Corona moves forward to the light.

Find a way out:
Tree forest: Look around.
Examine the huge tree at center and the blanket.
Take the 2 keys from the ground (one by
tree and other at right).
Examine and then take the 2 halves of an apple
hanging from the trees on the left and right.
One apple has 2 green pits; the other has 2 red
pits.
Fluctuating stone:
Examine and then look close at the suspended stone left of the huge tree
trunk.
Click on the stones to expose what is inside.
See a purple globes. The aim is to
change them to light colored balls and combine them into one white ball.
Click the balls inside the perimeter so that
the balls will be placed on the rim to form a circle.
Click the purple balls so that they turn to
white.
Eventually get a silver ball that looks like
the moon.

Make a portal:
Combine the 2 halves of an apple in inventory (take one and click it on
the other).
A portal appears. Enter the portal to go to
the rock forest.
Rock forest: Look at the
place. Time seems suspended.
Examine and take the abnormally sized seed
on top of a rock.
Take the key from bottom center.
Examine the locked rusty cage. It has a beating
heart. Try 3 keys collected on the lock. Nothing fits.
Make a portal:
Look close at the apple in inventory.
They split again and show the pits. Move the bottom left green
pit
out of its slot.
A portal appears. Pull back. Enter the portal
to go to inverted forest.
Inverted forest with statue:
Look around. See that the trees are inverted; the roots are on top.
Pick up the key on top left and another
key at bottom left.
Pick up the gold leaf floating left of the
statue.
Statue: Examine and
then look close at the statue. It has a snake depicted on its chest.
Place the snake carcass on the scroll it is
holding.
The head explodes. Take the large reptile
egg.
Make a portal:
Look close at the apple in inventory.
Move the left red pit out of its slot. The
other 3 pits should be back in their places.
A portal appears. Pull back. Enter the portal
to go back to forest with blanket.
Tree forest: You are back
to the original forest.
Hatch the egg: Place
the reptile egg on the blanket. Corona covers the egg.
Pull the blanket off and see that the egg
cracked. Inside is a ball. Take the golden ball.
Make a portal:
Look close at the apple in inventory.
Go back to the rock forest: Move the pits back
to their slots (all covered). Enter portal.
Go back to the statue and inverted forest:
Move left green pit off. Enter portal.
Go to new place - menhirs: Move the right
green and left red pits off. Enter portal.
Menhirs:
Look around.
Examine the menhirs. The left has 2 white circles. The right menhir has
2 black circles.
Hole: See a hole
in the ground between the menhirs. Push the hole.
Look close at pushed hole. Plant the seed
from the stone forest in the hole.
Stalk: A stalk
reaching the ceiling grows from the seed.
A carnivorous flower with a ball opens up.
Try to take the ball. The stalk swallows the ball.
Get ball: Click
on a fly hovering above the flower. The fly is swallowed by the
flower and it spits out the ball.
Take the dark ball. Examine the
dark ball with symbols that look like a map.
Altar: Climb the
stalk to be above the clouds.
Pick up the key at right and the key
at left of the screen.
Basin: Examine the altar. Place the gold leaf
from the inverted forest on the basin.
Pray to the altar. The gold leaf changes
to a gold key.
Take and examine the gold key. It
looks like a heart.
Make a portal:
Climb down back to the menhirs.
Look close at the apple in inventory.
Go back to the trees forest: Move the left
green and left red pits off. Enter portal.
Go back to the rock forest and the cage:
Move the pits back in their places (all covered). Enter portal.
Rock forest with cage:
Cage: Look close
at cage. Use the gold key on the beating heart cage. It fits and
opens the lock.
Try all other 7 metal keys to open the 2
side locks. The locks are random.
Heart: The cage
opens. The beating heart can be rotated.
Click-hold-turn the heart to spin it fast
into a ball. Take the dark bronze ball that has incisions.
Menhirs:
Make a portal:
Look close at the apple in inventory.
Go back to the statue and inverted forest:
Move left green pit off. Enter portal.
Go to the menhirs: Move
the right green and left red pits off. Enter portal.
Menhirs: Note
that the left menhir has 2 white circles and the right menhir has 2
black circles.
Use the 2 light colored balls (silver and
gold) on the left menhir.
Use the 2 dark colored balls (black and
bronze) on the right menhir.
The balls spin around the menhirs and
produce a new portal.
Enter the portal. Corona falls down from
the sky.
Part Seven: The Stag Tribute
Glade:
Eymerich finds himself in a glade.
Talk to Diana. Diana is already here but Eymerich
was brought here.
Find a way to get rid of Diana:
Eymerich wants to persuade her that she is not
Diana. Look around.
Deer prints: Go left pass
the altar and examine the deer prints on the ground.
The deer print gives Eymerich an idea. He wants to
attract a deer.
Attract a deer:
Altar: Go back to the altar at
right. Examine the altar surrounded by torches.
Look close at the altar. Eymerich says that Diana
is often shown with a deer.
Altar figure: See
cubes that can be turned horizontally or vertically.
Turn the cubes to form a picture of a
deer-stag.
Light comes out of the rocks to show a stag
across the pond. Look close at the deer.

Diana: Talk to Diana
again. Eymerich asks Diana for a hunting skill demonstration. She asks for
an arrow.
Diary: Read the new
entries at back pages of the leaf tab part - especially the very last page.
LOL.
Get an arrow:
Feather: Go left and take
the feathers off the right torch of the altar.
Branch: There are several
branches in the glade.
Go left to the group of trees on the left side of
the glade.
Take branch from the leftmost tree.
Birthing area: Go to the
right of the trees and the group of rocks at the corner.
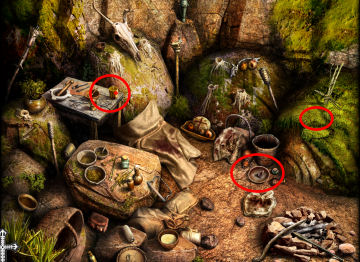
Examine and look close at the birthing area. Only
one item can be taken now. The other 2 will be later in the game.
Take the sharp stone - arrowhead on the
bowl by the bucket at right.

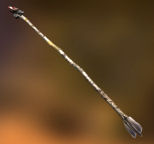
Make an arrow: Examine the flexible branch-rushes taken from
the tree.


Clean the stick: Look
close at branch-rushes. Remove the smaller branches by clicking on it.
Remove the smallest side branches first and
then remove the cleaned side branches from the main stick.
Automatically the bottom is notched.
Make an arrow: In inventory combine the
stick with either the feathers or arrowhead to get an arrow.
Diana's marksmanship:
Give the arrow to Diana. The stag is the target.
The arrow falls in the water and the stag runs
away.
Talk to Diana. Eymerich taunts Diana. Diana goes
into the water and drowns.
Dirge:
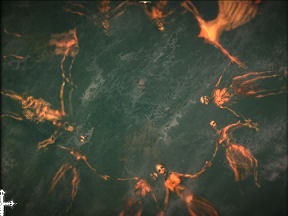
Hear a dirge. Listen at left side of the pond.
Corpses: Look at left side of
the pond and see corpses at bottom of pond.
Move the corpses by clicking on them.
Form the corpses into a ring by getting them to
hold each other - joined by their hands.
A woman floats to the surface.

Give peace to dead woman:
Birthing area: Go to the
birthing area.
Take the candle from the table at left. Take moss-mud from the rock at right.
Corpse: Go back to the
corpses in the pond.
Look close at the corpse of the woman. Eymerich says it is the
twins' mother.
Use the candle on the corpse of the mother.
Automatically, the candle is lit and placed on the floating mud.
See light come from the corpse and goes to the
wood. Hear a child laughing.
Woods: Go to where the
light landed - woods. Examine and look close at woods.
Remove the flowers; then the branches and
log.
See and take a doll left in the woods.

Demeter:
Exit left by the deer tracks and cliffside.
See Demeter blocking the bridge. Talk to Demeter.
She is looking for her daughter.
Give the doll from the woods to Demeter. Demeter
disappears.
Cross the water:
Cross the bridge and it breaks.
Pick up the stone from the ground.
Examine the stone formation on top of the boulder
across the water.
Use the stone on the deer head rock formation.
The rocks fall down on the water and makes a
bridge.
Climb the cliffside.
Cross to the other side. Climb on the clear left side, across at top and up
to the tree trunk.
Push the tree trunk out of the way.
Janus: Go left and
examine Janus. Take the red lichen from the cliff wall.
As Corona:
Corona falls down from the sky.
Look at the other side of the stone head - Janus.
Talk to Janus, stone head.
Eymerich and Janus talk to each other.
As Eymerich:
Change to Eymerich.
Remove the stone head:
Go to the altar.
Arrange the cubes to form a face with antlers. The circle lights up.
Click on the red lichen in inventory. Automatically it is
placed on the lit circle.
Light comes out of the altar.

Stone head: Go back to Janus
the stone head.
See the stag butts the stone head.
Eymerich and Corona updates each other.
Monastery:
The 2 priests see the representation of the 2
priests, Diana and Medusa by the monastery gate.
Listen to Eymerich's explanation. They are
projections. The real ones are the ones they met on the other side.
Talk to Demeter. Only the goddess can get
them inside the monastery. Demeter jumps off the cliff.
The goddess appears.
This document may not be
distributed without express written permission of the author and the content may
not be altered in any way.
For Questions or Comments
on this Walkthrough,
Please write to:
MaGtRo
Copyright © January/2015
MaGtRo
 GameBoomers
Walkthroughs and Solutions
