
All images are property of Warner
Brosô
![]()
Written
and Illustrated by Dr. Hugh
Layout and Website by Bert Jamin
Click on one of these images to go to that Level
Or click on the image at the bottom of this page to go to the next Level
© July 2009
Bert Jamin (www.gamesover.com)
This walkthrough, written and illustrated by Dr. Hugh, may not be sold and may
not be used for any commercial purposes. Neither is it permitted to publish this
walkthrough in any way without the written permission of the author Dr. Hugh.
Feel free to place this walkthrough on your web site or on your home page, on
condition that no part of this walkthrough is changed and that the name of the
author (Dr. Hugh), the URL of the owner of this site (www.gamesover.com)
and his E-mail address (gamesover@planet.nl)
are mentioned unchanged. For the most up to date walkthroughs always visit www.gamesover.com.
If you have any suggestions to improve this walkthrough, let me know by sending
me an email: gamesover@planet.nl.
Harry
Potter and the Half-Blood Prince
INTRODUCTION

Announcing
The 6th Harry Potter Game is in many ways superior to its predecessor Harry Potter and the Order of the Phoenix. Itís a good and logical story with excellent graphics and the Game recognizes your Gamepad which is automatically configured.
When
starting the Game you will be asked what Language you would like to play
the Game in:

The Language Selector
You
have a choice between English, French, Italian, German, Spanish, Portuguese,
Dutch, Polish, Russian, Danish, Swedish, Hungarian, Czech/Slovak,
Brazilian Portuguese, Finnish and Norwegian. Unfortunately there is no Mongolian available yet so I figured English would perhaps be a good alternative for the time being? To
select any Language, highlight one by using the arrows and press ENTER.
And then Harry will speak that Language.
Next
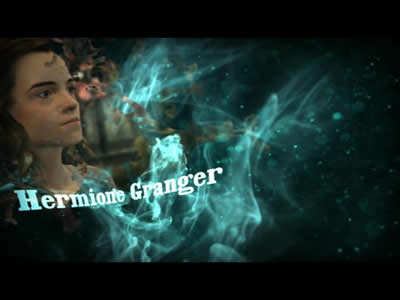
the Stars are introduced, and of course they grew a bit older now:

Harry Potter

Albus Dumbledore

Ron Weasley

Hermione Granger

Draco Malfoy
Then
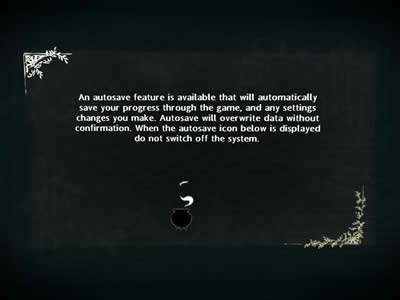
you will be asked if you would prefer the Autosave Feature turned on.
Autosave will overwrite data and Save Blocks without confirmation, but
an Icon down below the screen will let you know when the Autosave is
being made. Once the Autosave has been overwritten you cannot
return to a previous Save Block. There is a way though but it is very
time consuming: creating a Ghost Image.

The Autosave screen
By
now the Introductory Cinematic will start. So far you have not been able
to pause the Game for adjusting the Settings in the Menu. You can only
do that at the end of the Cinematic when Level 1 will start.
First
you will see a fast succession of the Gameís highlights.
Then, two Witches are descending a hill going down to

The descent of the Witches
They
enter a house where an obviously hypnotized Prof. Snape is sitting on a
table. They urge him to carry out the Dark Lordís orders and Snape
pledges the vow: I will.

An obscure house in a

Snape turns to the Lord of
Darkness
A
fire breaks out and next you see some fragments of a Newspaper and how
pictures of a sad looking Harry were taken with Dumbledore watching in
the background.


Fragments of a Newspaper

Pictures of Harry are taken for the Paper
At
this point Level 1 will start with a cinematic showing an aerial view of
this strange house in the Burrow:

The start of Level 1
Now
you are able to pause and open the Menu.
The
X-Box 360 Controller for Windows
Throughout
this Game Iím using a wireless version of this Pad. It is convenient
to play the Game with the Pad because it is recognized by the Game,
already preset, and when you select playing with the Pad all
instructions are given with the colored and lettered Buttons.
Iím not sure if the Game recognizes any other Gamepad, but you may try
though.
I would strongly advise you friends to play with a Gamepad. There are
lots of mini-games like Quidditch and fast Broom Flying through
star-shaped Rings that makes controlling much easier.
So
from here on all Control Buttons that are mentioned in this Walkthrough will
be for the Xbox 360 Controller for Windows (either wireless or
not).
You may easily convert by selecting Keyboard/Mouse for your Gameplay.
All instructions in the Game are then provided for the Keyboard and
Mouse Buttons.
The
Menu
If
your Gamepad is plugged in and activated you may already open the Menu
by pressing \ (the symbol of the Start Button), or by pressing ESC
on the Keyboard.

The Menu
Whatever
you do in the Menu windows, Harry will watch your moves (!).
Browse to Options first and
click on the Tab. In the Options Menu browse to Controller
Configuration.

Click on the Controller
Configuration Tab
The
Controller Configuration Menu will show the Xbox 360 Controller for Windows on the left side and the Keyboard/Mouse
on the right side. Select the Pad by using LAS (Left Analog
Stick) by pressing green (the A Button on the Pad).

Selecting the Gamepad
Press
red (the B Button on the Pad) to return to the Options
Menu. Turn on the Subtitles
(or donít).

The Subtitles Tab
Press
red to return to the Options Menu and select Graphics
Quality.

Highlight Graphics Quality
Adapt
the Graphics Quality according to the power of your Computer. When
powerful enough, select the highest values for enjoying optimal quality.

The Graphics Quality screen
When
you now press red to return to the Options Menu you will have to
restart the Game to confirm the new Graphics Settings. Just follow the
instructions given on the screen.
Now
highlight Save and Quit.

Press the Tab Save and Quit
Next
you will see one of the following Advice screens for a few seconds:


Advice screens
After
one of the Advice Screens you will be forwarded to a new Menu where you
must first make a Profile.

The Menu with the Profiles
Browse
to Profiles and press green
to open.

You may create up to three Profiles
The
three Profile Folders are respectively called:
Profile
1: HPHBP0
Profile 2: HPHBP1
Profile 3: HPHBP2
Each
of these Folders contain a Savegame Profile File, that DOES NOT
contain the Savegames or Autosaves.
The
pad where you find the Profile Folders in
Desktop\<Computer name>\AppData\Local\Electronic Arts\Harry Potter
and the Half Blood Prince\HPHBP0- HPHBP1- HPHBP2.
Press
red to return to the previous Menu and select Clubs.

Highlight Clubs
Press
the Tab and you will see the following screen:

The Clubs Information
Press
red to return to the previous Menu and highlight Rewards.

Click on Rewards
Now
you will get a screen with the Tab Badges.
Click on that.

Badges
This
will show your collection of different kinds of Badges earned during the
Game.

The different Badges
Now
you may Continue the Game:

Continue
Or
you may Quit the Game:

Quit
Savegames
and Save Blocks
Just like I did in the previous Harry Potter Walkthroughs I will indicate the Save Blocks by numbers. These are sections between a newly overwritten Autosave and the next Autosave.
Crests
In
this Game you have to collect Hogwarts Crests and Mini-Crests. Youíll
soon find out what they are and how to get them in Level 1. Mini-Crests
are found in glowing objects. It takes 1000 Mini-Crests to earn a
Hogwarts Crest. There are 150 Hogwarts Crests to collect of which 25 are
converted from Mini-Crests.
Levels
Iíve
created 31 Levels in this Game accordingly to the subject or task Harry
has to do. These are the names of the Levels:
1.
Chasing
the Snitch
2.
To
Hogwarts
3.
Following
Nearly Headless Nick
4.
Potions
Club
5.
On
your way to Duelling Practice
6.
The
Gryffindor Duelling Club
7.
Meeting
Dumbledore
8.
Reparo
9.
Quidditch
10.
To
the Greenhouses
11.
Potions
Club revisited
12.
On
your way to Ginny
13.
To
the Quidditch Pitch
14.
Quidditch
against Slytherin
15.
To
Slughornís Party
16.
The
Party
17.
Cocktail
Punch
18.
The
Library
19.
The
7th Floor
20.
Mystery
Potion
21.
Dumbledoreís
office
22.
Practicing
23.
To
Potions
24.
The
26.
Quidditch
Match against Hufflepuff
27.
Chasing
Malfoy
28.
Slughornís
Memory
29.
Quidditch
Match against Ravenclaw
30.
Visit
Dumbledore Ė Part 1. On your way to the
31.
The
Half-Blood Prince
Quit/Restart
the Game
When you quit the Game after an Autosave you will get a survey of the number of Crests and Mini-Crests you have gathered so far.

Your number of Hogwarts Crests and Mini-Crests
When you restart the Game after an Autosave point you must not go through the full Introduction Cinematic. This is how you start your new Game:

Language Selector

The EA Logo

The WB Logo

The Logo: An EA Bright Light Videogame
At
this point you can press \ to open the Menu. You will get this
screen first:

The Intro to the Menu
Press green to open the full Menu:


The
Menu
Press
green when Continue is
highlighted and again your amount of collected Hogwarts Crests and
Mini-Crests will be shown. Then the Game will continue from your last
Autosave.
What
now?
Well... thatís simple: all you do now is starting the Game and enjoy playing as much as I did!
LEVEL 1: