 |
|
 |
|
 |
|
 |
|
Click on one of these images to go to that Level
Or click on the image at the bottom of this page to go to the next Level
© November
2002 Bert Jamin (www.gamesover.com)
This walkthrough may not be sold and may not be used for any commercial
purposes. Neither is it permitted to publish this walkthrough in any way without
the written permission of the author. Feel free to place this walkthrough on
your web site or on your home page, on condition that no part of this
walkthrough is changed and that the name of the author (Dr. Hugh), the URL of
the owner of this site ( www.gamesover.com
) and his E-mail address ( gamesover@planet.nl
) are mentioned unchanged. For the most up to date walkthroughs always visit
www.gamesover.com.
If you have any suggestions to improve this walkthrough, let me know by sending me an email: gamesover@planet.nl .
Level 13: Gryffindor Challenge
(The Secret Level)
INTRODUCTION
Hidden
Areas
The
game setting for a 3D game is like a jigsaw puzzle that has a geometrical shape.
These puzzle pieces– the game areas – have to fit as tightly as possible.
With the first four Tomb Raider games this body was a cube divided into smaller
cubes. These areas fit tightly together, so there are no empty spaces. However,
with the Harry Potter games that body isn’t a cube but – say, a sphere.
Hence, there are always spaces and these areas are sealed off with the default game play. The designers usually fill these empty spaces though with all kinds of creative stuff using their imagination. The game makers need access to any part of the game without having to play a whole section. There may be a bug to be fixed or... whatever. They have a built-in cheat code for that and in this Harry Potter game that particular code is the Debug mode.
Debug
mode
The
debug mode adds one button to the controls of the game: the Delete key. Other
useful buttons for the debug mode are F4 to select a level, F6 to get full
health, and F9 to automatically learn all spells, but these are not of our
concern here, as cheating during game play takes all of the fun away. I don’t
encourage cheating in my walkthroughs.
The
controls by the key arrows and mouse convert to first person view and you can
then explore the entire sphere and all of its clusters. You’re simply
navigating a camera in a 3-D computer graphic environment. Hence, you can pass
through all obstacles like walls, floors, and ceilings; go up and down, in
circles, etc.
When
you pass the boundaries of the sphere the screen becomes black because there is
nothing there, so you simply backtrack and you’re back within the sphere. But
now comes the interesting part. Wherever you stop in whatever spot of an area
and you press Delete again, Harry materializes at that spot in the real
environment of the game! I know of at least a couple of such sealed off areas
that Harry cannot enter: a kind of cave without any opening and a large area
that contains an entire Level!

Poor Harry would be stuck forever in this room.
Now
the purpose is to find a way to get into this huge area and play that Level!
Secret
Level
This
Level is hidden behind a door that Harry cannot open during normal game play. It
can only be entered in the Debug mode. It now becomes clear that the
Harry Potter games are very complicated games that may be played on different
levels of difficulty. Children play the games for fun collecting Wizard Cards
and secret seekers who are real computer enthusiasts look for Secret Levels.
Now
why have the game designers hidden this Level so well? Was it a Level that they
did not find satisfactory, but did not want to delete it? Was it the first ever
Challenge they created? Would they purposely open a way for the real Aficionados
to discover this Level? My guess is a combination of all.
A
real computer wizard is interested in some of the game Directory files and with
a boot process there is a BOOT.ini written in Wordpad with all kinds of data
determining the boot process. There is such a GAME.ini in the System folder of
the game Directory as well.
When
reading this text, most items end in “=True”, but some end in “=False”.
One of these data is “bDebugMode=False”. This explains two things: firstly
the Debug in their current game mode is disabled by default. Secondly, replacing
False
by True
would enable the Debug mode.
Conversion
into Debug Mode
First let’s convert the game into Debug mode. Open Windows Explorer and look for the installed Harry Potter and the Chamber of Secrets directory in the left hand part of the Window. Click on the + prefix and all folders will unfold. Click on the System folder and all its files will appear on the right side of the Window. Somewhere in the middle you’ll find the file GAME.ini

The System folder and its contents; the arrow points to the GAME.ini file.
Double
click on that and the text of the file appears. Go
to the bottom of the (long) file. Counting
from the bottom up the third paragraph is:
[HGame.baseConsole]
bDebugMode=False
bUseSystemFonts=True
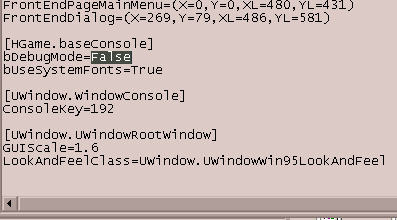
The bottom of the GAME.ini text.
Highlight
False and type True:
[HGame.baseConsole]
bDebugMode=True
bUseSystemFonts=True
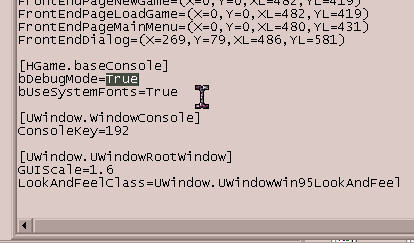
The altered button of the GAME.ini text.
When
you go out of the GAME.ini text a window will now ask if you want to keep the
changes. Select yes. Now
you’re ready to play Harry in Debug mode.
So
in order to enter that sealed off area where the Gryffindor
Challenge is located, you
must go in there in activated Debug
mode and materialize Harry in there. Then deactivate,
so you can play that Level after all like any other Level, and this is what we
intend to do here.
Finally,
as a precaution, copy the last saved game [12.13]
of the slot you have played the game in, to at least two other slots or to a
folder of your choice. Start
the game from your regular slot and load the game. You’ll automatically load
the last save block of the game.
THE
GRYFFINDOR CHALLENGE
Preparation
[13.1] You will find Harry standing by the fire in the Gryffindor Common Room near the Save Book he just used.
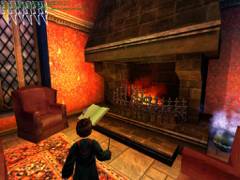
Harry stands by the fireplace.
Note
there are small green letters in the front right corner now indicating you’re
playing in the Debug mode. Also
Harry will only have the first of his stamina lightning symbols
operative out of six in the
upper right corner.
However,
if you still have Wiggenweld potions in your inventory, you can use them and
fill up the lightning symbols – one per bottle. Run
all the way up the stairs again until you reach the upper balcony and turn
right. This door was not accessible in the game, remember? That
is the sealed off entrance to the Gryffindor challenge.
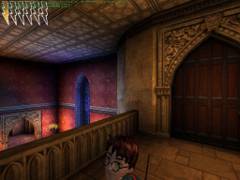
The inaccessible door on the balcony
The
Secret Entrance
Now
face the door and press Delete and then press Upper Arrow. The
view will turn into first person and you will penetrate the door. Once inside
the room behind the door release the Upper Arrow and press Delete
again to get Harry back to normal. The game will then load.
There
are 10 Challenge Stars and 9 Secrets to be found. The Secrets constitute hidden
rooms that upon entering produce a typical sound of chimes. At each moment the
number of discovered Secrets can be checked on the menu by pressing Esc.
As always, when Harry takes the Completion Star, the Challenge will be over.
The
Bridge over the Void
Harry
is standing on a ledge now and has to perform a running jump over the gap to
reach his first of 10 Challenge Stars spread throughout this Level.
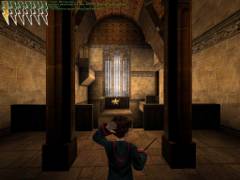
Harry’s initial position for the Challenge
First
turn around and you’ll notice a chest standing in each corner. Extract the
Beans with Alohomora. Sometimes each contains a Choco Frog too, so try to catch
it and increase you stamina.
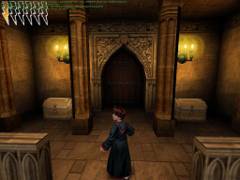
Two chests in the corners near the entrance
Now
jump to the middle platform and make sure you don’t fall down. If so, you’ll
have to start allover from [13.1]
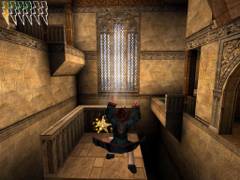
Do a running jump to the first
Star
Turn
right and jump through the arch to the next balcony. In the left corner is a
Diffindo rope that will open the door on your left. Take care of the chest with
Alohomora for the goodies. Standing in front of the Spongify carpet you will
already hear the grumbling sound of some Gnomes. Spongify the carpet and jump
high to the next ledge.
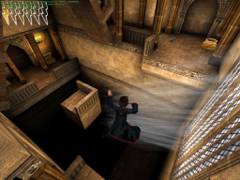
Do a Spongify jump to the opposite higher ledge.
Empty the cauldron for Beans with Flipendo and cast Alohomora on a suspicious looking niche under the arch. Enter the room with the cauldron and you’ll hear the sound of chimes. This is your 1st Secret Room! Cast Flipendo on the cauldron and take the Beans.
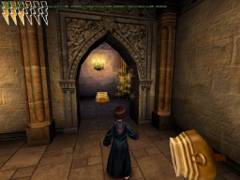
The First Secret
Turn
left and cast Alohomora on a dark niche under another arch. You’ll see a chest in there. Go inside and listen to the
chimes again. There is your 2nd Secret Room. Open this chest with Alohomora. Go
outside and follow the track of colored Beans on your right until you reach a
mechanism with a rope.
Diffindo
on the rope will lower both halves of the bridge on your left where you’ll see
Harry’s 2nd Challenge Star in front of a spider web. Destroy
the web with Diffindo and open the lock on your left with Alohomora.
The
Tower
The
Antechamber contains a cauldron with Beans. Now
you’ll be standing high on a ledge. Look down: you’ll see the floor of a
high Tower with two chests and 4 Gnomes. Now also look up to notice how tall
that Tower is. Obviously you’ll have to climb that Tower all the way up
through the protruding platforms.
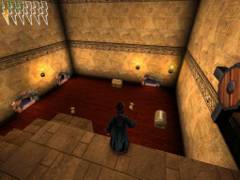
Floor of the Tower
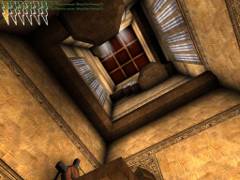
View from the bottom
Be
very careful with the Gnomes since Harry has only one lightning symbol. Left of
the ledge you notice a staircase with high steps. Go down the stairs and stand
on the lowest step. Stun a Gnome with Flipendo and quickly jump down to throw
him into the closest of the four holes. Immediately run to the step again and
repeat this until all 4 Gnomes are safely thrown into their holes. Now
open both chests with Alohomora; one usually also contains a Chokkie.
On
the highest ledge you’ll notice another wheel mechanism with a rope to cast
Diffindo on. A ledge with a Magic Carpet will protrude from the wall. Spongify
the Carpet and jump up to a higher ledge. Wait, do not Spongify this Carpet yet!
Follow
the track of Beans all around the ledge. At the end a panel in the wall will
slide upward revealing a Flipendo sign. Charm the sign and a short cut will show
how a new track of Beans is formed along the ledge again.
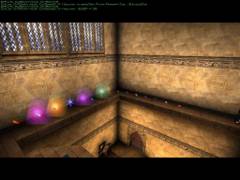
A magic track with Beans
Follow
the track again to the Carpet and Spongify it now. Take a high jump to another
ledge with a Carpet.
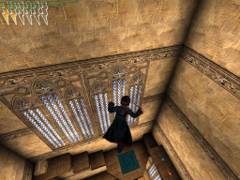
Still another higher ledge with a Magic Carpet
Again
do not jump higher yet, but turn right and follow another track of Beans until
you reach the wall. Turn around and in the opposite corner notice a staircase
with three ledges and a chest on top. Walk there and open the chest with
Alohomora.
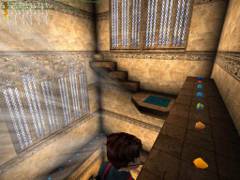
A chest in the opposite corner
Most
likely the chest contains a Chocolate Frog besides a number of Beans, but is
very hard to catch the Frog and he’ll probably drop all the way down. Take
a jump from the Spongified Carpet and jump to the highest ledge with the 3rd
Challenge Star!
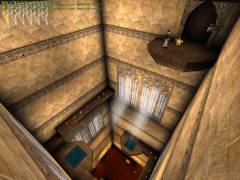
Harry’s 3rd Star on the highest ledge of the Tower
Open
the lock of the door with Alohomora and Flipendo the cauldron most likely
containing a Frog. On your right a staircase goes down to a Save Book behind a
spider web. Diffindo
on the web and the saved game is yours.
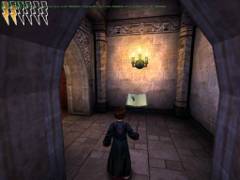
The sole Save Book of this Level
The
Room with two Blocks
[13.2]
HP enters a room with a block puzzle, a ledge and a roof both full of Beans, a
Challenge Star on a ledge, one on another ledge behind bars
and one in the center of
the roof beams that seems beyond reach.
Hmm...
your main puzzle in the Secret Level!
You’ll
have to catch all three Challenge Stars in this room in a certain sequence.
First we’re going for the Star on the roof. Push the tall block near the ledge
with the beans by casting multiple Flipendo’s. Now push the square block
behind the other block. The new
position of the blocks looks like this:
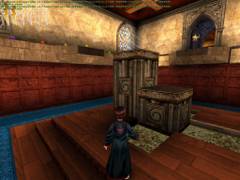
A way to the ledge with Beans
Climb
from the smaller block to the larger and do a running jump to the ledge. Cast
Alohomora on the section of the wall right in front of you and a secret
rectangle in the wall will open up revealing a hidden room. Enter and listen to
the Chime sound, indicating this is your 3rd Secret Room.
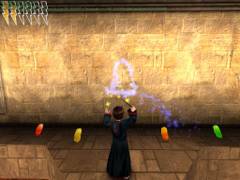
Alohomora on the middle part...
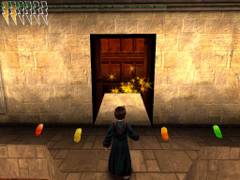
...lowers a part of
the wall
Go
inside and climb the ledges on your left until you reach a ledge with a wheel
mechanism. Cast Diffindo on the rope and a wall will lower allowing access to
the beam construction under the roof.
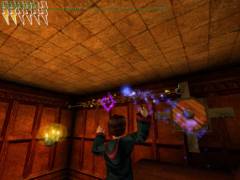
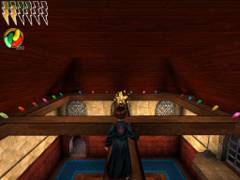
The secret entrance to the attic
Grab
the 4th Challenge Star and carefully walk over the Beams collecting
all Bertie Bott’s Beans and then return through the Secret Room to the ledge
and grab all Beans there too before jumping down to the tall block and back to
the floor. Now
push the small block to a side groove. Then you can push the blocks in a
position in front of the balcony with the grilled fence:
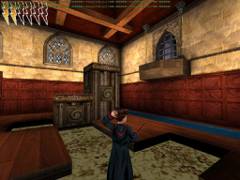
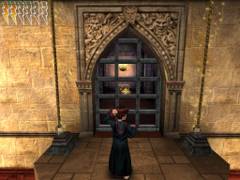
The way to the grilled balcony
Shoot
both ropes with Diffindo and the grille will slide upwards. Go
inside and seize your 5th Challenge star. Open the chest for the
goodies, turn around and direct Alohomora to each part of the walls near the
entrance. These are your Secret Rooms # 4 and 5. Open
each chest with Alohomora and increase your treasure of Beans. Jump
down to the floor and shuffle the blocks in front of the third balcony. Jump to
it and you’ll see two Challenge Stars.
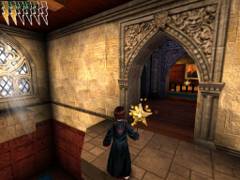
Two Challenge Stars in that passage
Take
your 6th Star and enter the passage.
The
Library
Immediately
on your left you’ll see a door with a lock. Deny that for now and go on to
your 7th Challenge Star. The door behind you will close and you’ll
hear the grumbling sounds of Gnomes again. Go seize the Star and look at the
Gentleman’s painting in front of you. Cast Alohomora on the painting and it
will slide left and reveal a Magic Rope. Cast Diffindo on the Rope and a cut
scene will show a bookcase sliding open on your right.
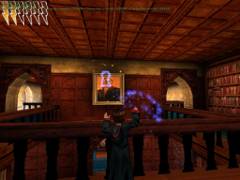
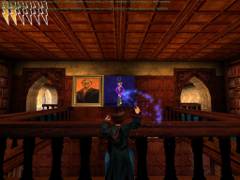
A tricky painting
The
new opening gives access to a dark passage going upward to your 8th
Challenge Star. Walk inside and you’ll here the chimes: your 6th
Secret Room! Grab
the Star and turn left and right. Cast Alohomora on each wall to find two Secret
Rooms # 7 and 8 - each with a chest on the floor. Open them – most likely at
least one of both contains a Frog as well.
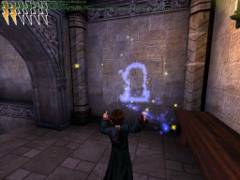
Another Secret in these walls
Walk
around the landing and look down at the Library. The Completion Star is on a
bookcase and downstairs you see a bunch of Fire Crabs and a couple of Gnomes
patrolling around!
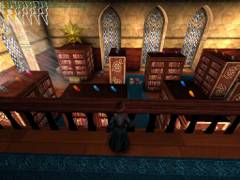
Some nasty guards downstairs!
Go
out to the left side of the Library and cast Alohomora on the Lord’s painting.
It will slide aside revealing a Magic Rope. Cast Diffindo and a cut scene will
show a bookcase in a corner of the Library halfway retreating into the wall.
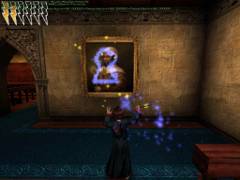
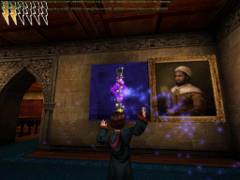
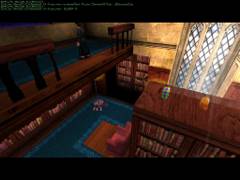
Alohomora and Diffindo move the bookcase inward
Now
run to the other corner and repeat that on the Lady’s painting. A cut scene
will now show how the case fully retreats revealing a room with a Challenge
Star!
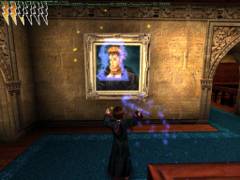
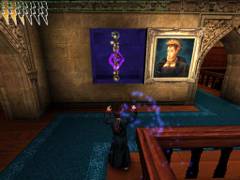
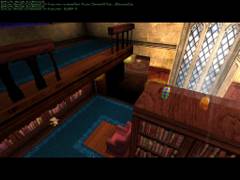
The bookcase has now fully disappeared
Turn
around and cast Alohomora on the chest at the end of the landing. Look
downstairs from this spot and notice that the room with the Star is in the far
left corner and that there are lots of chests between the bookcases.
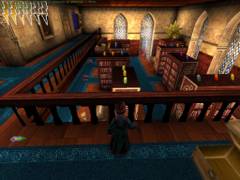
Fire Crabs, chests and the corner room
Go
down the stairs through the open entrance near the Lady’s Portrait and notice
that it gives access to the Library. Now
return to the locked door near the sealed entrance of the second floor landing
and open the door with Alohomora. Go down and find another door with a lock to
open.
This
one gives access to an Antechamber of the Library. On the other side of the wall
you’ll see a spider web sealing off an entrance. Don’t run towards it yet
but before entering the Antechamber turn right and find another spider web.
Open
it with Diffindo and find a chest in there. Get the Beans out of there with
Alohomora. Now
walk into the Antechamber where the Crabs and the Gnomes won’t bother you and
notice a cauldron and two Gnome holes in a wall. Cast Flipendo on the cauldron
for the goodies.
Cast
Diffindo on the spider web in the corner and enter a dark passage where you’ll
find your 9th Challenge Star. From the spot of the flipped cauldron
watch the entrance giving access to the Library, and should you see a Gnome pass
by, cast Flipendo on him, quickly run to him, grab him and throw him into a
hole.
You
may run in to chase the second Gnome and stun him too for disposal in one of the
holes. Watch the attacks of Fire Crabs and avoid them as much as you can, or
flip them on their back by quickly casting Rictusempra. Run
to the 9th and final Secret Room and capture your 10th and
final Challenge Star.
You
may run around the Library now while stunning Fire Crabs with Rictusempra and
opening the chests. Then
run up again to the corner with the Gentleman’s painting. Jump through the gap
in the banister to the first bookcase.
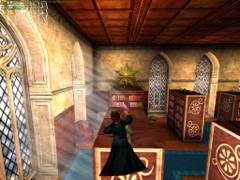
Jump to the first bookcase
Do
not jump to the opposite case that holds the Completion Star because chances are
that you’ll drop down to the floor. Instead, turn right jumping to all the
bookcases in a large circle to the Completion Star, meanwhile grabbing all of
the goodies that are on top of them. Finally,
win that Completion Star!
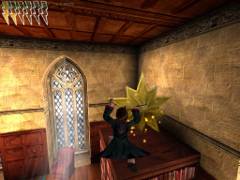
End of Challenge!
[13.3]
Harry is now in front of
the Pink Lady outside the Gryffindor Common Room and has accomplished his Secret
Gryffindor Challenge.
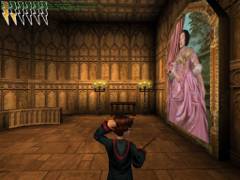
Harry seems a bit puzzled
EPILOGUE
Harry
is now free to discover the Castle and the grounds and find out if there are any
other doors or walls that might hide things. To
activate the Debug mode again each time press Delete and pass a wall or
door or go flying around the stages of the game, through walls and floors and
discover the Castle and the grounds! Perhaps
you may discover some new secret areas! Have fun!
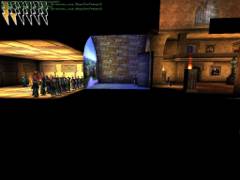
The setup of the stages
Thanks to Warner Bros for this great game!!
And even more thanks to Dr. Hugh for this excellent job!!!